Make AND RECORD Your Presentations in Canva
I'm going to be honest with you, if you've been recording presentations via Loom or Zoom, you no longer need to add that step. Canva has integrated recording into the editor so you can record your presentations and export audio files if necessary. I'll show you how to make that happen so you can simplify your virtual presentations in the future. Without further ado, let's hop in.
Canva Presentation is an incredible way for you to design powerful and engaging presentation slides. In a previous post, I specifically covered how you can import an old PowerPoint into Canva, refresh the look, and even export it as a PowerPoint file. So if you missed that the tutorial feel free to check it out here. But in this tutorial, I'm really going to emphasize all of the options that are available if you are presenting or recording your presentation. Canva allows you to really make that presentation more engaging through a lot of the features that they have built-in and I want to make sure that you guys see Canva from the admin side of things, that you see the things that you can click on within the Canva Design Editor to accomplish tasks as you are presenting your presentations. So if you do not have access to Canva Pro and you would like access free for 45 days, feel free to utilize my link lashondabrown.com/canva. With a Pro account, you are going to have access to all of the features that I demo in this tutorial.
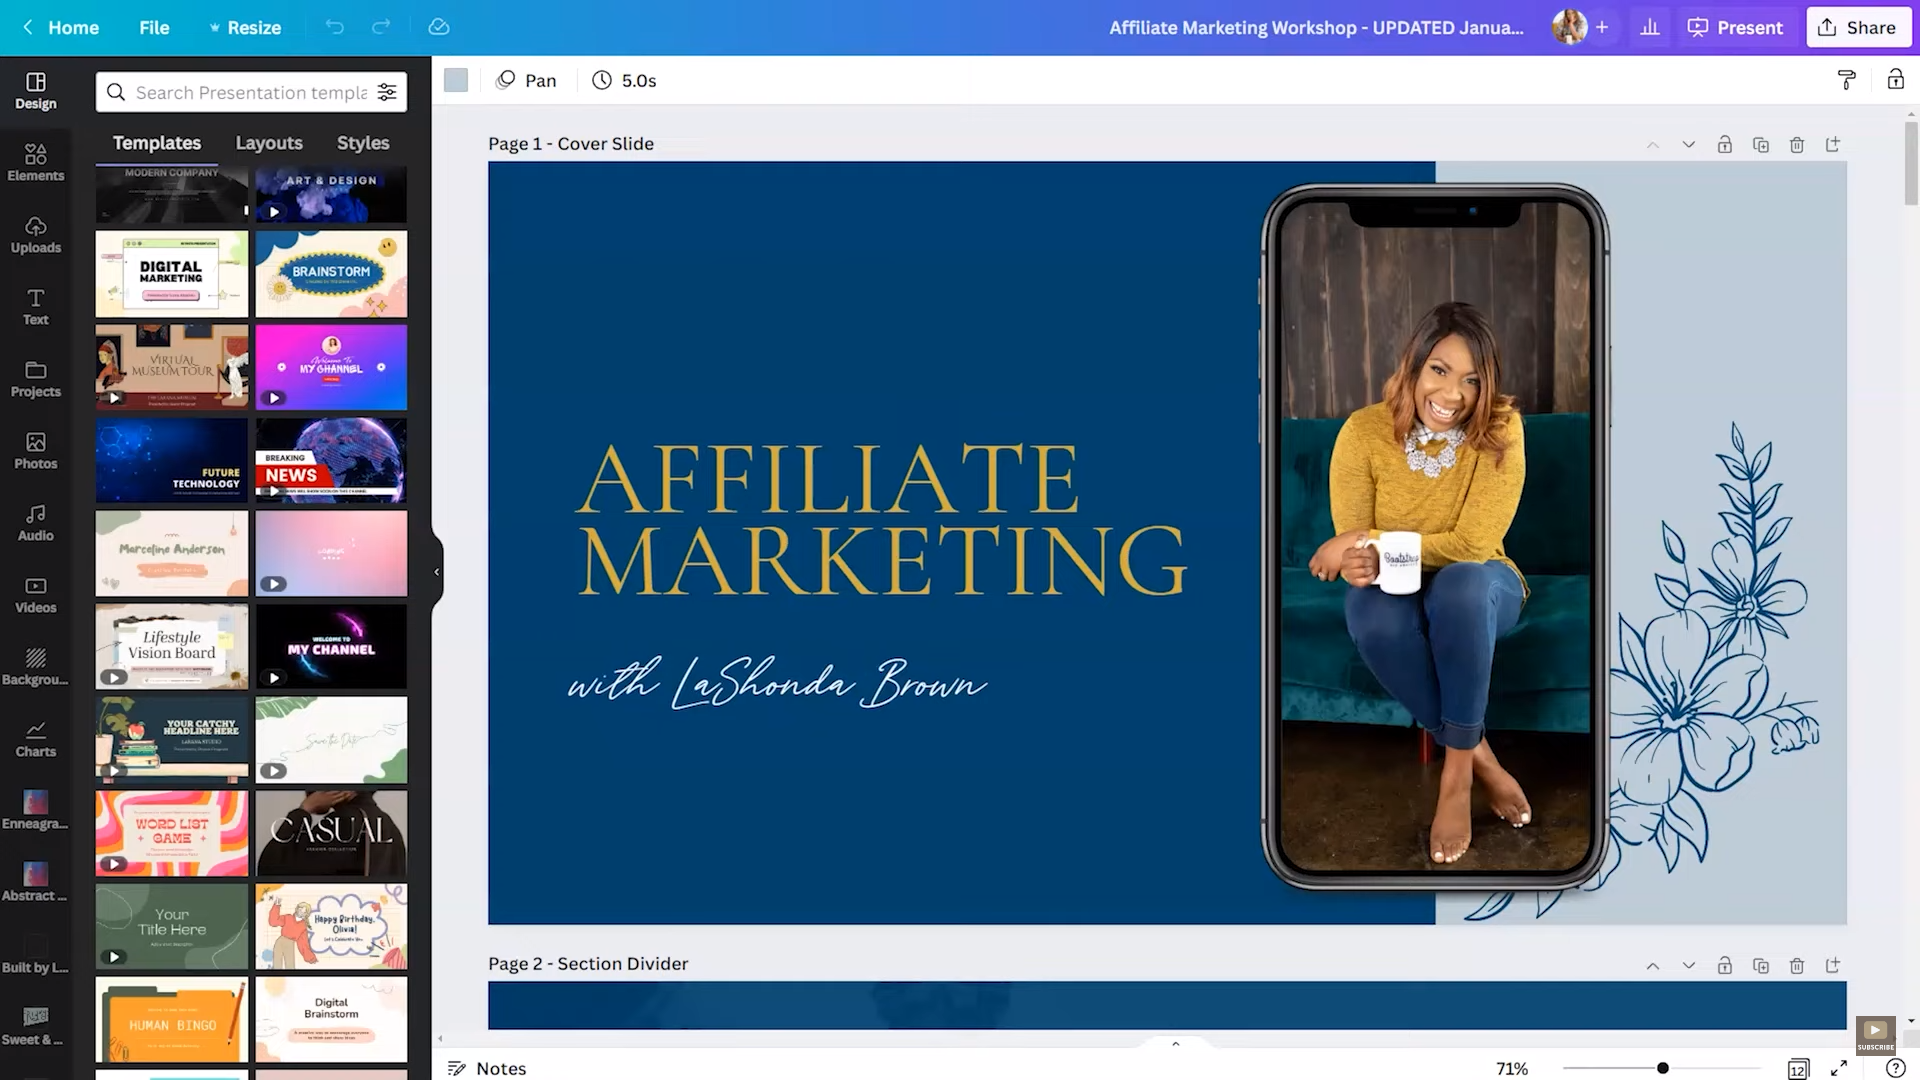
If you are starting from scratch, you can always search for presentations within Canva and there are over 11,000 templates to choose from. Now for this example, I'm actually going to use a previous slide deck that I created about affiliate marketing. What's interesting about my journey as a full-time content creator, is I actually took a gap year between 10 years of client work and becoming a full-time content creator. So my income was heavily slanted toward affiliate marketing and I get some incredible conversion rates on the tools that I recommend. For some of the companies that I work with, my conversion rates are as high as 60%. So I'm asked to speak about this a lot and so this is a slide deck that I reference quite often to show people how to do what I do.

Now this slide deck has 12 different slides and it's one of my text-heavy presentations. But quite often when I am speaking on a stage, I tend to have more photos versus text to make it more engaging for an in-person audience. But if I'm teaching just a very quick webinar, masterclass, however, I tend to have more text on screen. So you have a little cover slide with my name and my photo, you have a cover at the end with my contact information, what you'll learn in this session, and then the different slides.
Now within Canva you have a couple options and I want to make sure you are aware of in the top right-hand corner. Present will allow you to present your presentation to an in-person or virtual audience. So imagine this button is reserved for when you have an audience available. But if you are recording your presentation and you want to go to the Canva recording studio, you're actually going to click on the share button and I'm going to show you what that looks like.
When you click on present you have three options. Number one, you can do a standard presentation, which will allow you to advance your slides at your own pace, you can use autoplay to set a speed and have your slides progress automatically, or you can do Presenter View which will allow you to view your notes and your upcoming slides. I'm going to select Presenter View but you also have the option to share your presentation so that people can view your slides without editing it. So if you happen to share your slides after a presentation, I would use the view-only link so your students don't have the ability to change the wording of your slide.
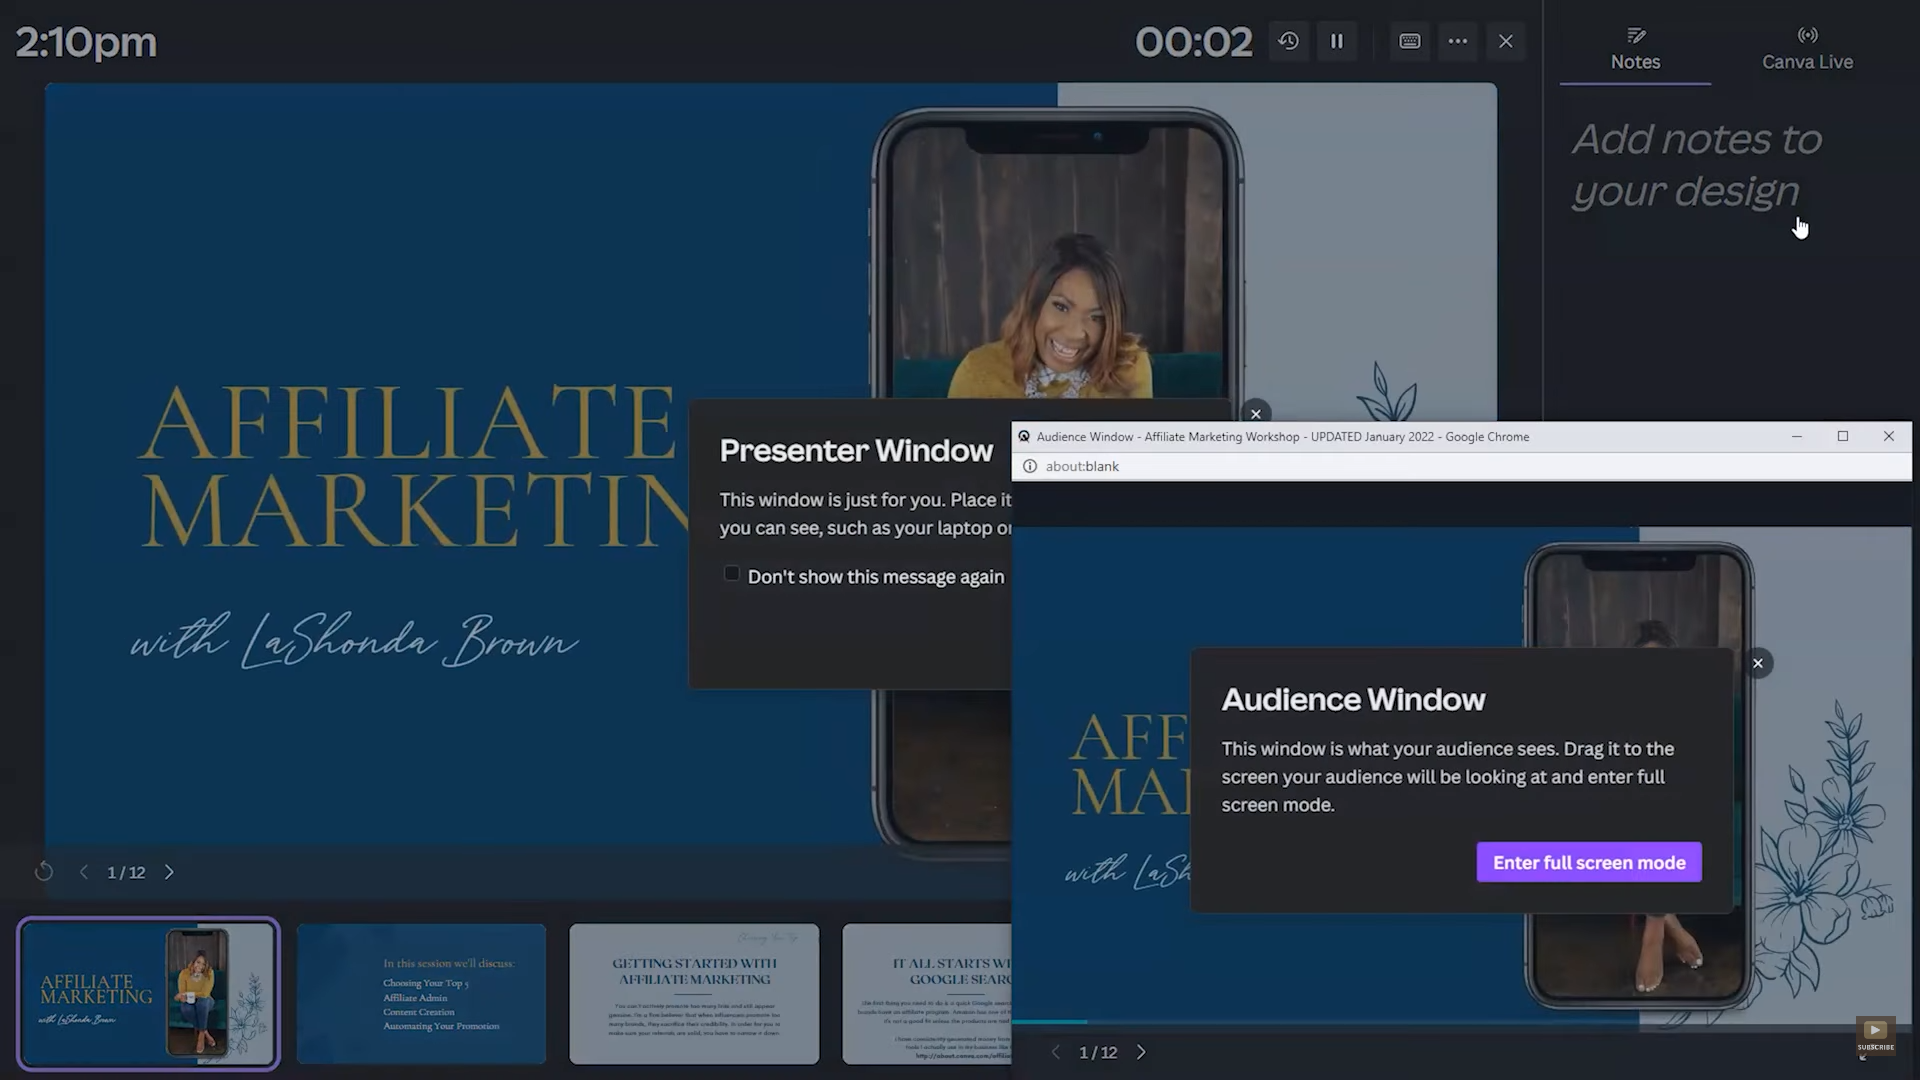
Now once you click on Presenter View, you're going to see a couple options. If you happen to have two screens, I would encourage you to actually drag the audience window on your secondary screen. If not, you can just minimize this or close it but ultimately the audience window shows you what your audience can see when you're presenting. So they cannot see your notes and they cannot see your upcoming sides. So feel free to use those to help you to stay on topic and to not get lost in your presentation.
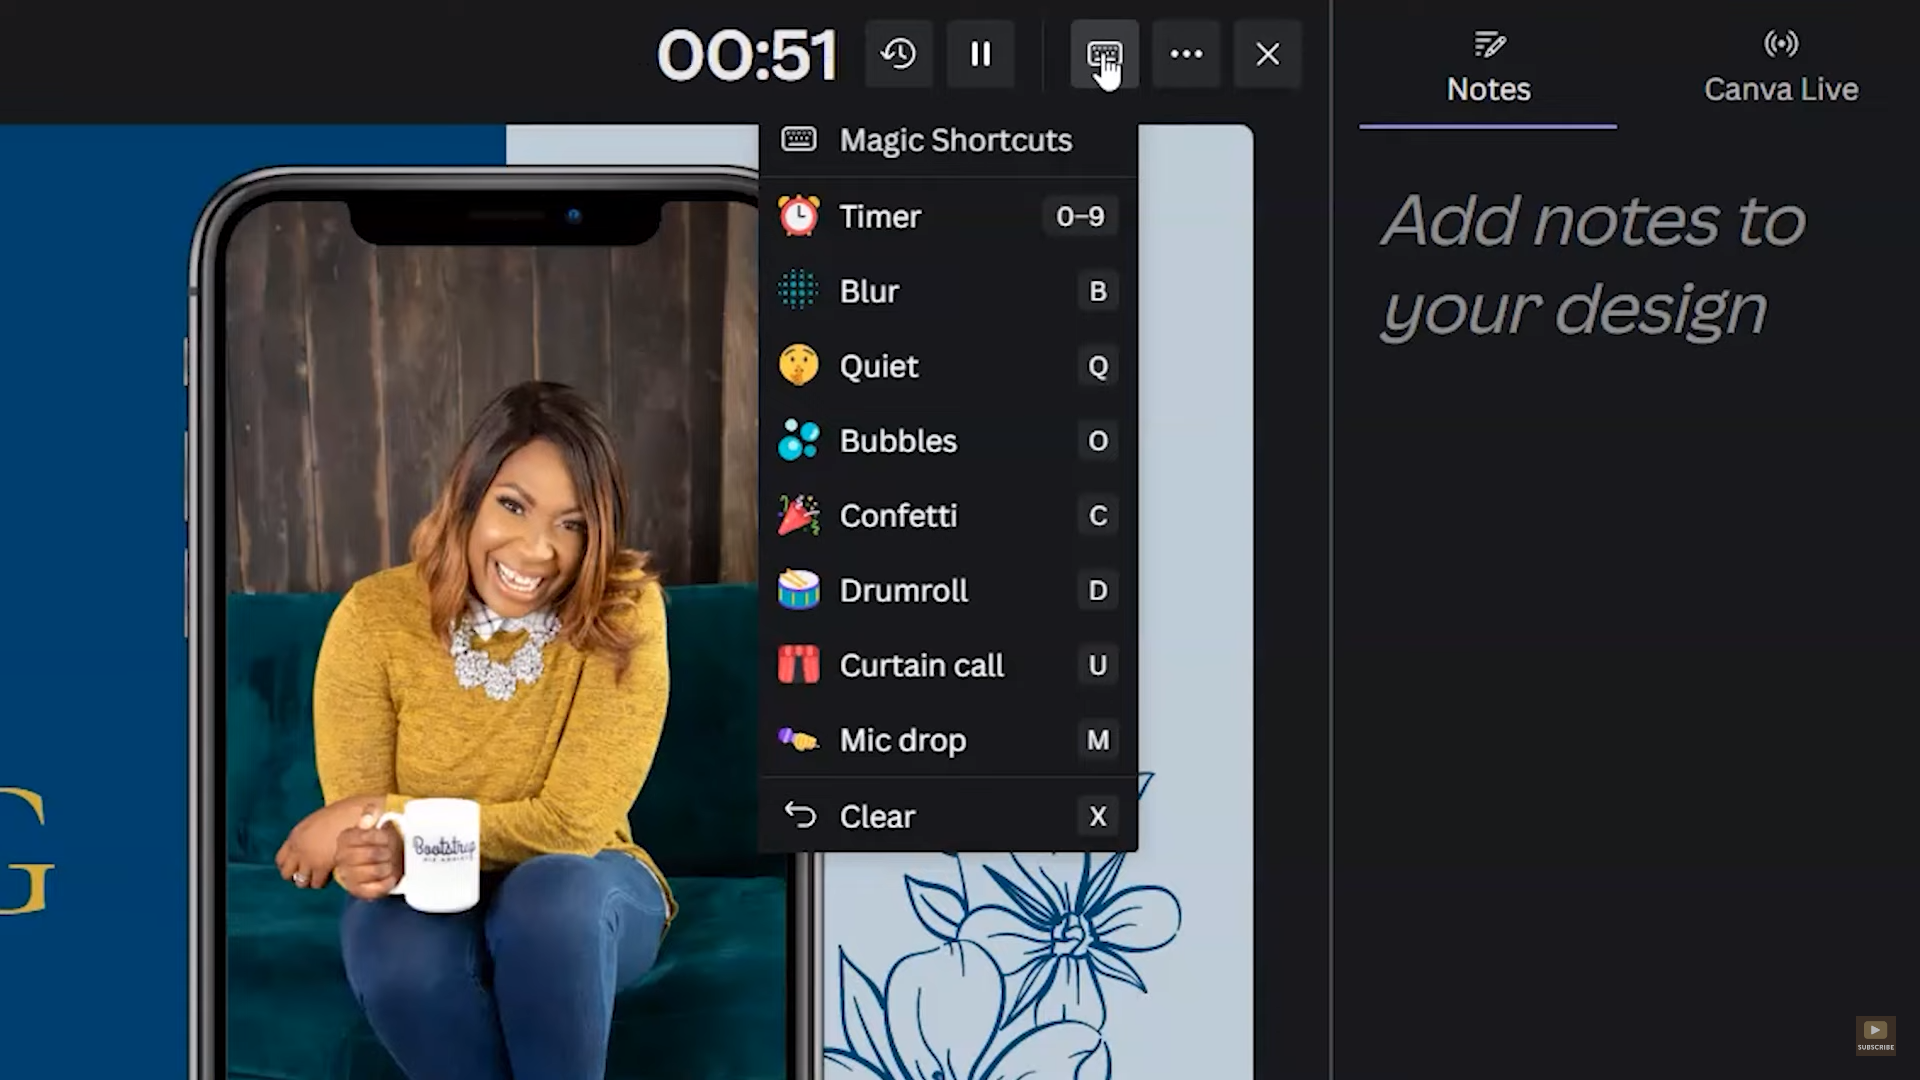
You also have a few options at the top when you're in Presenter View. You have the ability to use Magic Shortcuts which are so much fun. You can add a blur, you can add a quiet emoji, confetti, drumroll, curtain call, or mic drop. These are really fun ways to engage your audience and they can't see you doing this. You can also use the remote control to use some of these Magic Shortcuts. I will feature the remote control in another post. But if you click on those three dots, this is how you will access the share ability.
To get access to a 30-Day FREE trial of Canva Pro visit https://lashondabrown.com/canva
This is the longest free trial available for Canva and was provided to me as a Canva Verified Expert. Use this affiliate link to claim your 30-Day trial and support the channel at no additional cost to you.
So if you are presenting in person and you want someone else to be progressing your slides or adding the little effects, all you need to do is click on those three buttons and share your remote control with the person helping you or with your own cell phone so that you can turn a cell phone into a clicker. So those are just some of the few options that are available if you are using Canva to present your presentation.
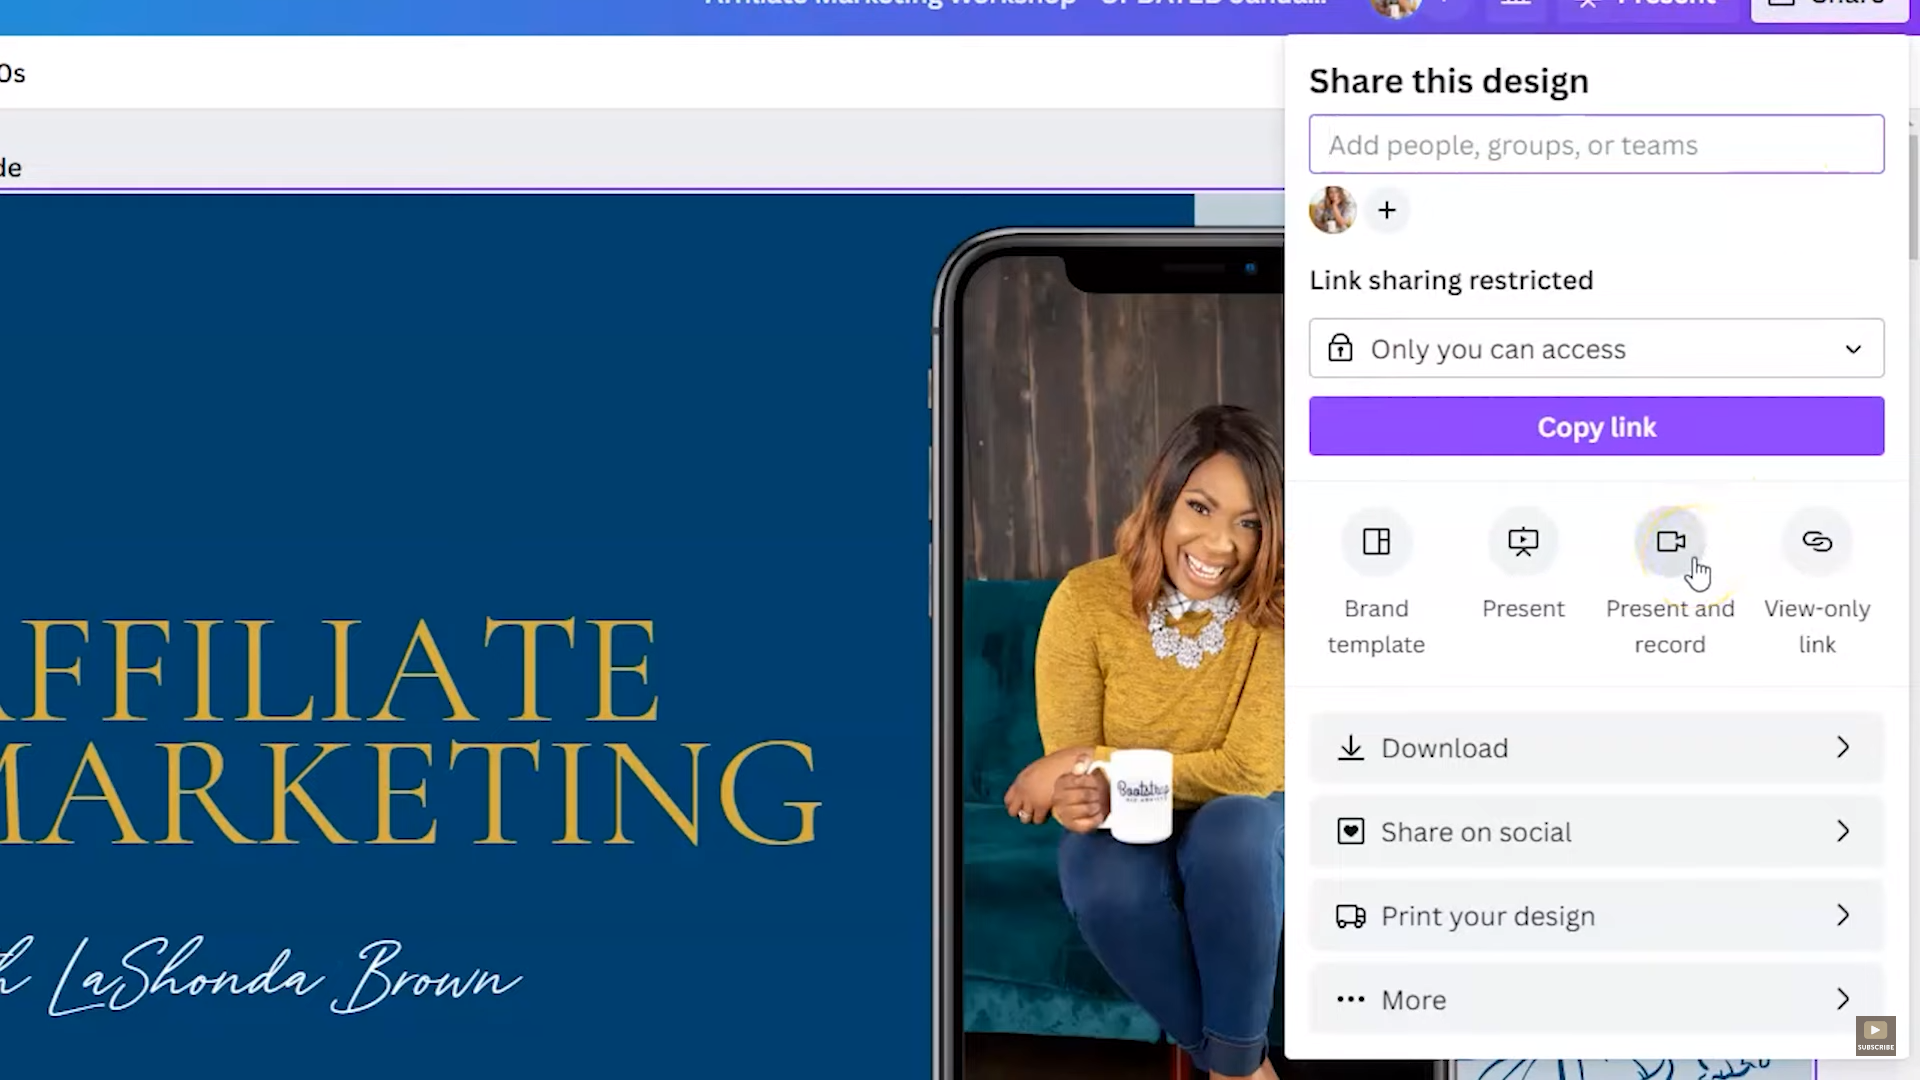
If you click on Share, I want you to notice something really special under the Copy Link button. You're going to see a little button that says present and record. So before we were just presenting our slides, but now we have the option to record and by clicking on present and record, it's going to send you to the Canva recording studio. Which looks a lot like Loom if you look carefully. We're going to click on Go to recording studio and you're going to see some options. First of all, you want to allow Canva to see your camera and to have access to your microphone, if that's something you want to do.
So for this one, I am going to just show you what it looks like on a really crappy webcam. The other camera that I have is currently set up for live streaming. But if you don't want to be seen at all, you don't have to allow your camera. So if you're just using Canva to simply record your voice as you're presenting your slides, that's an option. We're going to tell Canva you are allowed to see my camera and you are allowed to see to use my microphone.
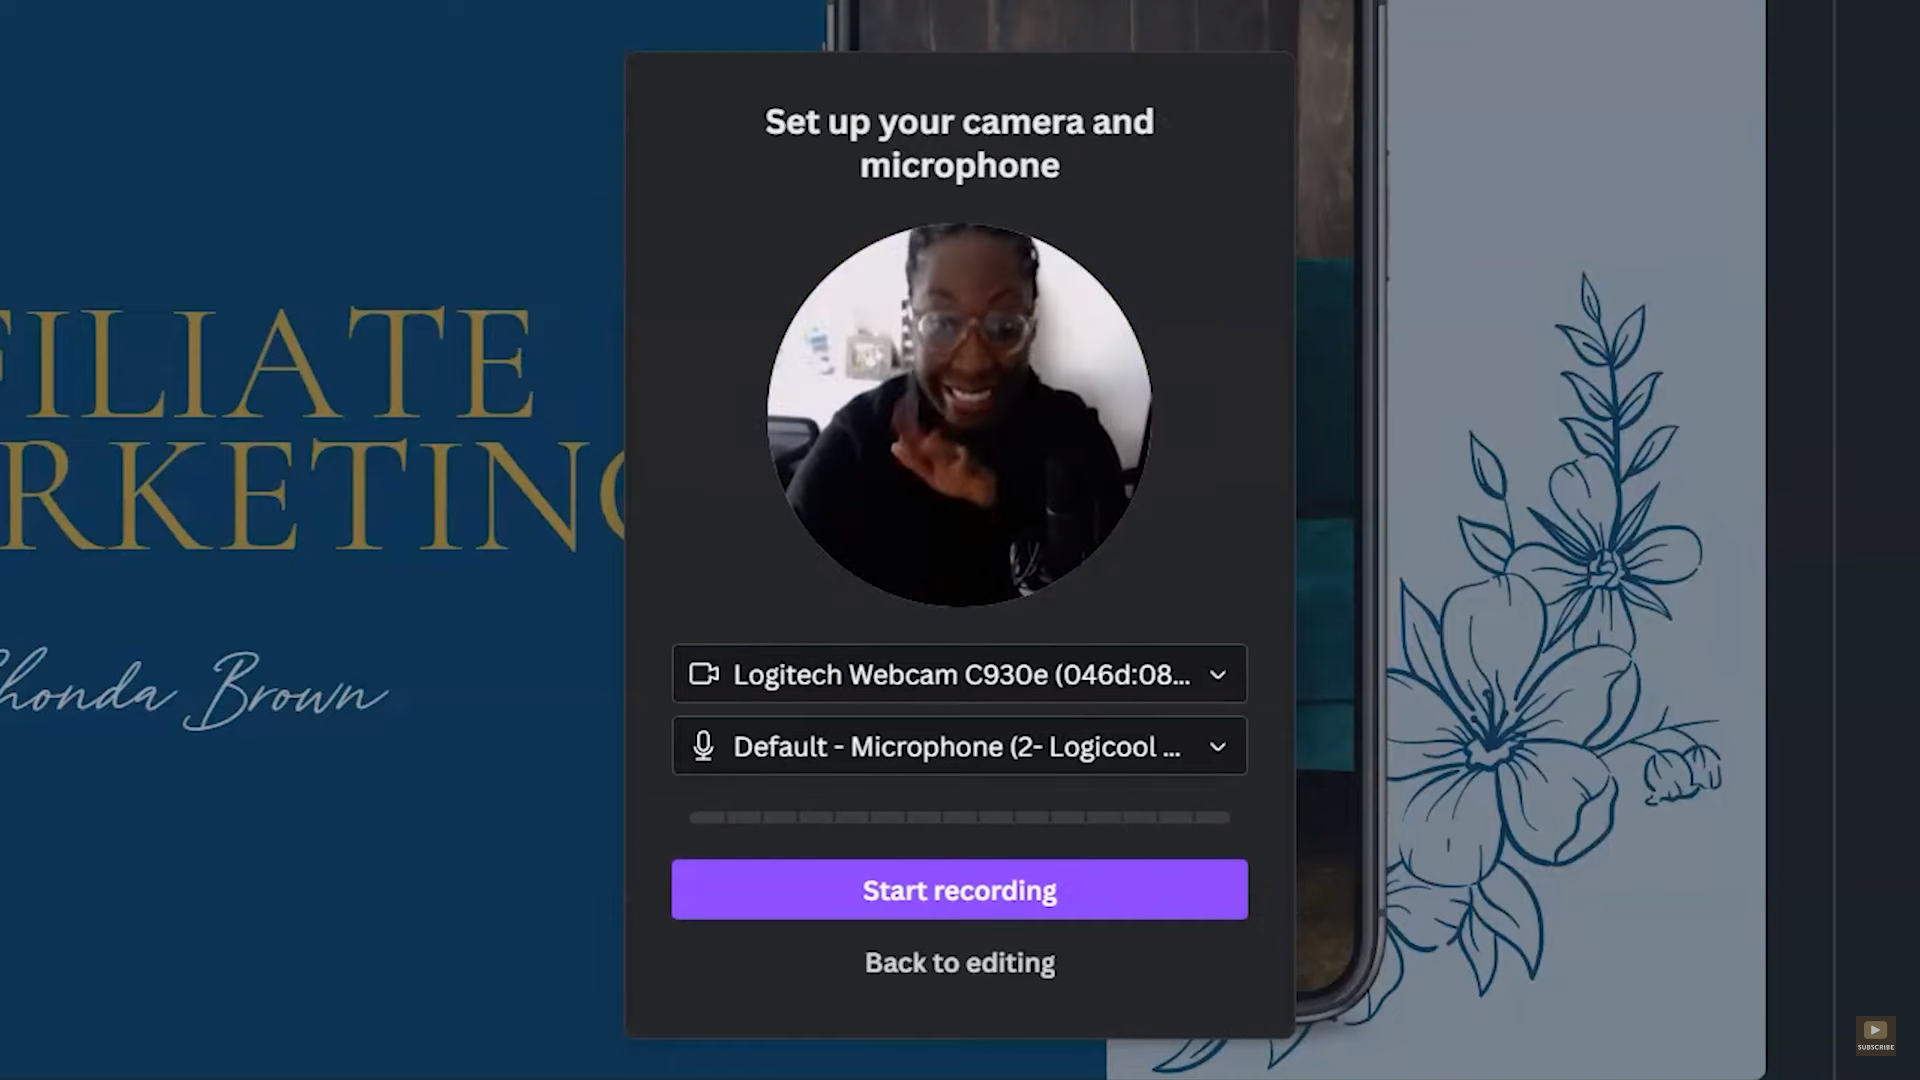
Okay, here we are. So trust me typically I would have a better video feed but this is just for the example. We're just using a very old Logitech webcam and I am going to switch the default microphone to my Rode microphone which is you know, my little podcaster mic that's on an arm and we're going to hit start recording. So it's going to count me down which is really nice for me to take a little breath and you can see down in the left-hand corner. It is recording me actually giving the presentation so I could say, “Hello and welcome to the Affiliate Marketing Webinar, where I teach you how to generate passive income by referring people to tools that you use in your business. In this session, we're going to discuss choosing your top five, affiliate admin, content creation, and automating your promotion”.
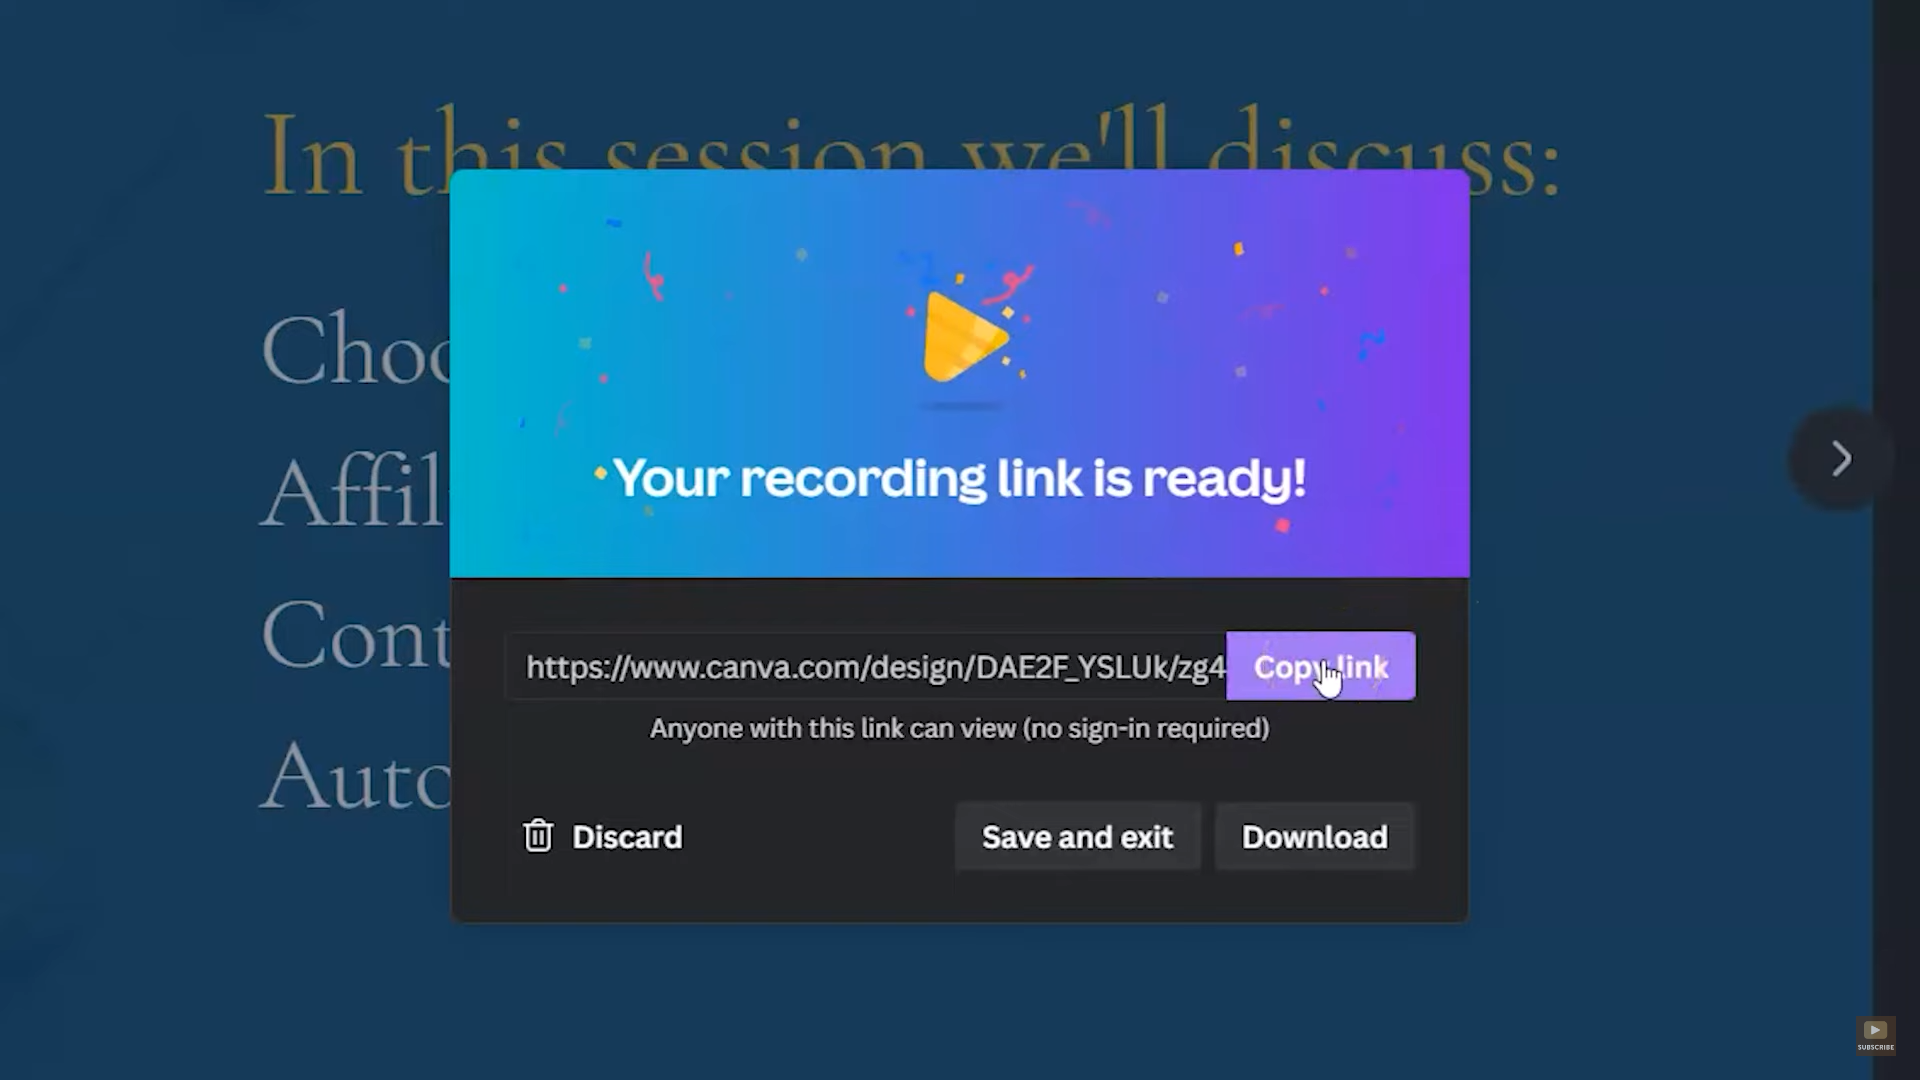
So say for instance, I go through all my slides and I am ready to end the recording. So at the top, I'm going to click end the recording and it's going to upload this to Canva. I wanted to keep it nice and short so you guys can see what happens. But look at that little message you want to keep the browser open while it is creating the recording. Once you do that, it will tell you your recording link is ready. And you have a few options here, you can copy the link so anyone can view without signing into Canva, you can discard this if this was not what you were hoping for, you can simply save the recording and exit, or you can download your recording.
What I love about this new feature within Canva is it allows you to not only create that presentation but to complete the whole process. If you are trying to make a recording of you presenting your session whether it is for a virtual conference, or if it's simply for your team. So like I said, this is going to allow you to potentially eliminate some subscriptions to other services if you were solely using them to record yourself giving a presentation. I love when Canva integrates features to help us to save money in the long run, you know, Bootstrap Biz Advice is all about trying to help you to grow a biz without breaking the bank. So what I find those little tricks within Canva I'm going to make sure you know about it. And I would encourage you to share this post with any fellow educator you know who may not be aware that this is an option within Canva.
Thanks so much for reading this post. I'm LaShonda Brown, Canva Verified Expert from Virginia. If you would like a Canva Pro free trial for 30 days, visit lashondabrown.com/canva. If you like this post, you'll want to watch my video about refreshing your old PowerPoints with Canva next. Until next time to tata for now.
Pin This Post

you might also like: