Import Photoshop Files in Canva
Did you know you can import Photoshop files in Canva now? In this post, I'm going to show you the fastest way to design and update brochures so you can make sure all your information is up to date for the months and years to come without spending hours redesigning your print material. Without further ado, let's hop in.
I love Canva Pro because Canva is always expanding to add new features and with a Pro account I am granted access to them. So if you are not currently using a Canva Pro account, I would encourage you to use my link lashonabrown.com/canva to get access to a free 30-day trial. I am showing everything within a Canva Pro account. So if you see me do it on my channel with a Pro account, you will be able to do it on your own. So I have some old Photoshop files on my computer and I actually don't currently have Photoshop on this particular desktop. So being able to import those PSD files within Canva to make modifications is not only saving me on subscription costs, but it's saving me a ton of time. So that's just one benefit of utilizing a platform like Canva for your graphic design. So what I want you to do is go ahead and look through your computer. If you have any Photoshop files in there, I would encourage you to utilize the steps that I show in this post and see how easily you can import it and make changes.

For this example, we are not going to select a template, we're actually going to import a past design. To do that you're going to click on create a design and then in the bottom right-hand corner, you're going to click on Import File. From there, locate the Photoshop file and then Canva will scan your file. I'm currently utilizing a PC so when I located that folder, it didn't immediately show the files that I needed to import. So in the bottom right-hand corner where it says custom files, I simply clicked on that and selected all files once I did that it revealed the Photoshop files.

When your design has finished scanning, you'll see it located under the recent projects and simply click on the image above the file name. From there Canva will try to scan your document and do its best to locate the elements within the file. Now you can see it's not flawless in this case, but it is pretty darn close to what you see in Photoshop. So on the right-hand side, you can see that Canva is asking for feedback on your file import. So you'll need to let them know how did your graphics turn out? How did your text turn out and then offer any additional feedback. This is super helpful for Canva as they continue to evolve with this import tool. It will get better and better over time and based on your feedback so make sure that you take care of that and then simply scroll down on the right-hand side and click Submit when you're done.
Once you're done with your survey, you can click on back to main menu and then just click on the great area of your design. What's great about importing your design into Canva is once you have it in here, it will actually single out the elements of your design. So we're going to zoom in a little bit closer and we're going to see what we're able to modify. As we hover over in this case, we're actually able to delete the little icon there and I can replace it with an icon from Canva.

To get access to a 30Day FREE trial of Canva Pro visit https://lashondabrown.com/canva
This is the longest free trial available for Canva and was provided to me as a Canva Verified Expert. Use this affiliate link to claim your 30-Day trial and support the channel at no additional cost to you.
The shape is actually recognized so I can click on the shape and change the color. So if you change your brand colors, and now you guys are going for green or a pop of yellow where before you were that light blue. Now you can simply select it and change the color. Same thing with your fonts you're able to double click on these text boxes. You can obviously change the text but you can also modify the font. So if you changed your brand fonts, you can make that change there as well.
Another fun feature about Canva Pro is you have access to a huge photo library without having to leave the site. So if when you initially did this design, you were limited on images, but you would like to do something a bit more image heavy, you can locate photos on the left-hand side and simply type in what you're looking for within the search bar.
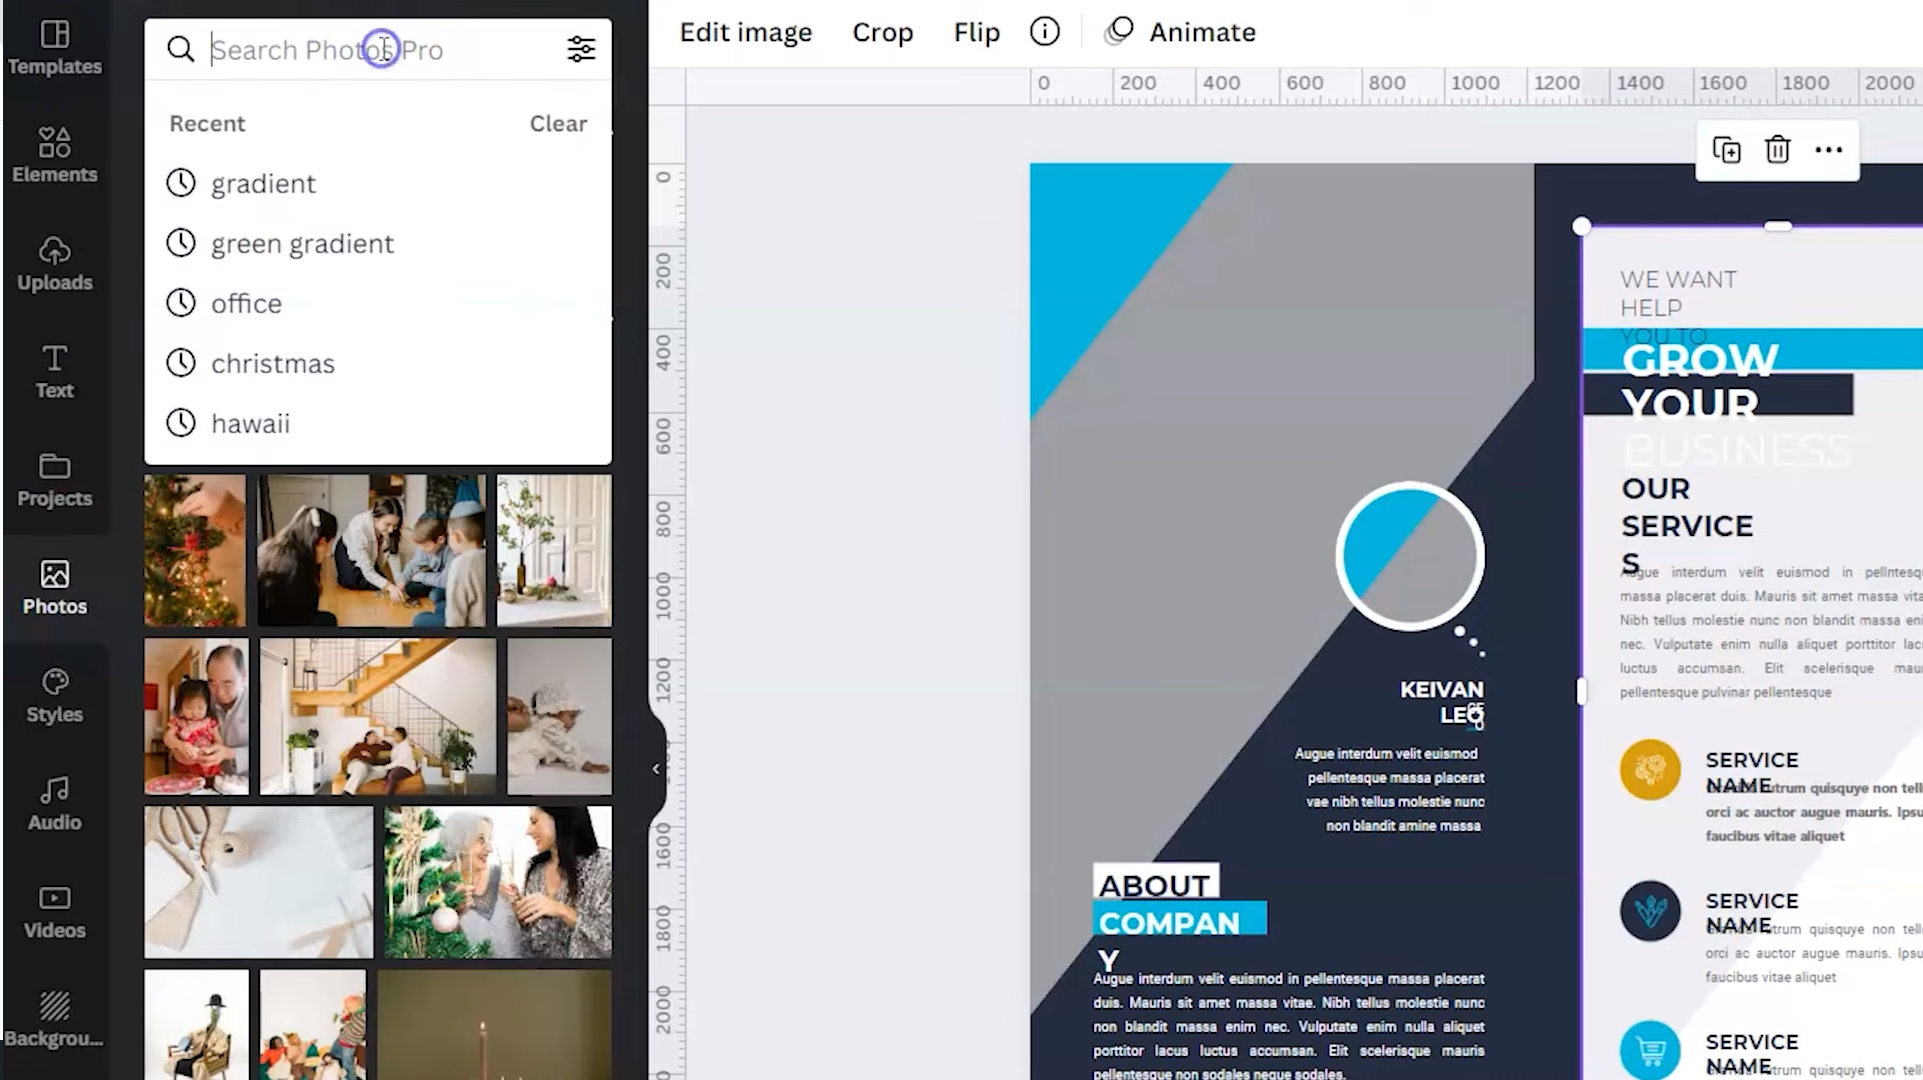
There's also a little button on the far right-hand side and if you select that, you have even more options to find images that fit your need. You can search by color, you can search by orientation, you can even search specifically for cutouts if that's what you need. You can also create mock-up images and pull those in. If you guys saw the video I did about Smartmockups, not only can you use Smartmockups to create a 3d book cover design, you could create a mock-up of a computer with your website on it, a cell phone with your website on it and maybe that would be a better fit for your brochure. So with Canva Pro, you're able to stack some of these features on top of each other to elevate your designs.
What's also really nice about how Canva scans your Photoshop files is it allows you to play around with layering your images. So say for instance, here we've got that gray shape, I can actually get rid of that. And because Canva recognized it as an element. I could locate an image from the left-hand side within the photo library. And I could click and drag it directly into place. If I didn't like where the image was showing up, I could double-click on it and I could click and drag it to change how the image appears. And I absolutely love this because before maybe I needed a subscription to Photoshop. I also needed a stock photo subscription so that I could have imagery that was more diverse. Well, now you don't have to worry about that because it's all integrated within Canva.

So for those of you who are small business owners, you're running nonprofits and you are trying to scale back on your subscriptions, here is a very simple way for you to make that happen without having a loss in quality. So if you are using a free account, I would encourage you to go ahead, do the free trial for 45 days and see what you have access to because you may be able to get rid of some of your other subscriptions simply because you are leveraging Canva Pro.
Thanks so much for reading this post. I'm LaShonda Brown and I’m a Canva Verified Expert from Virginia and if you would like to try Canva Pro free for 30 days, visit lashondabrown.com/canva. I'm always available to help train your nonprofit team on how to get the most out of your Canva subscription. So if you'd like to book a training, feel free to message me at lashondabrown.com. Until next time, tata for now.
Pin This Post


you might also like: