Bulk Create Your Canva Designs
While I love creating Canva videos about simple things you can create, many of you are ready for something a bit more advanced. So in this tutorial, I'm going to show you how to bulk create design variants from data. A great application of this technique would be creating business cards for your team or place cards for your next event. I’m even going to show you how to merge your images into frames to save time. If you've never used Canva, this might be a bit much for you but for my Canva Pro fam, you're going to love this new trick. Without further ado, let's hop in.
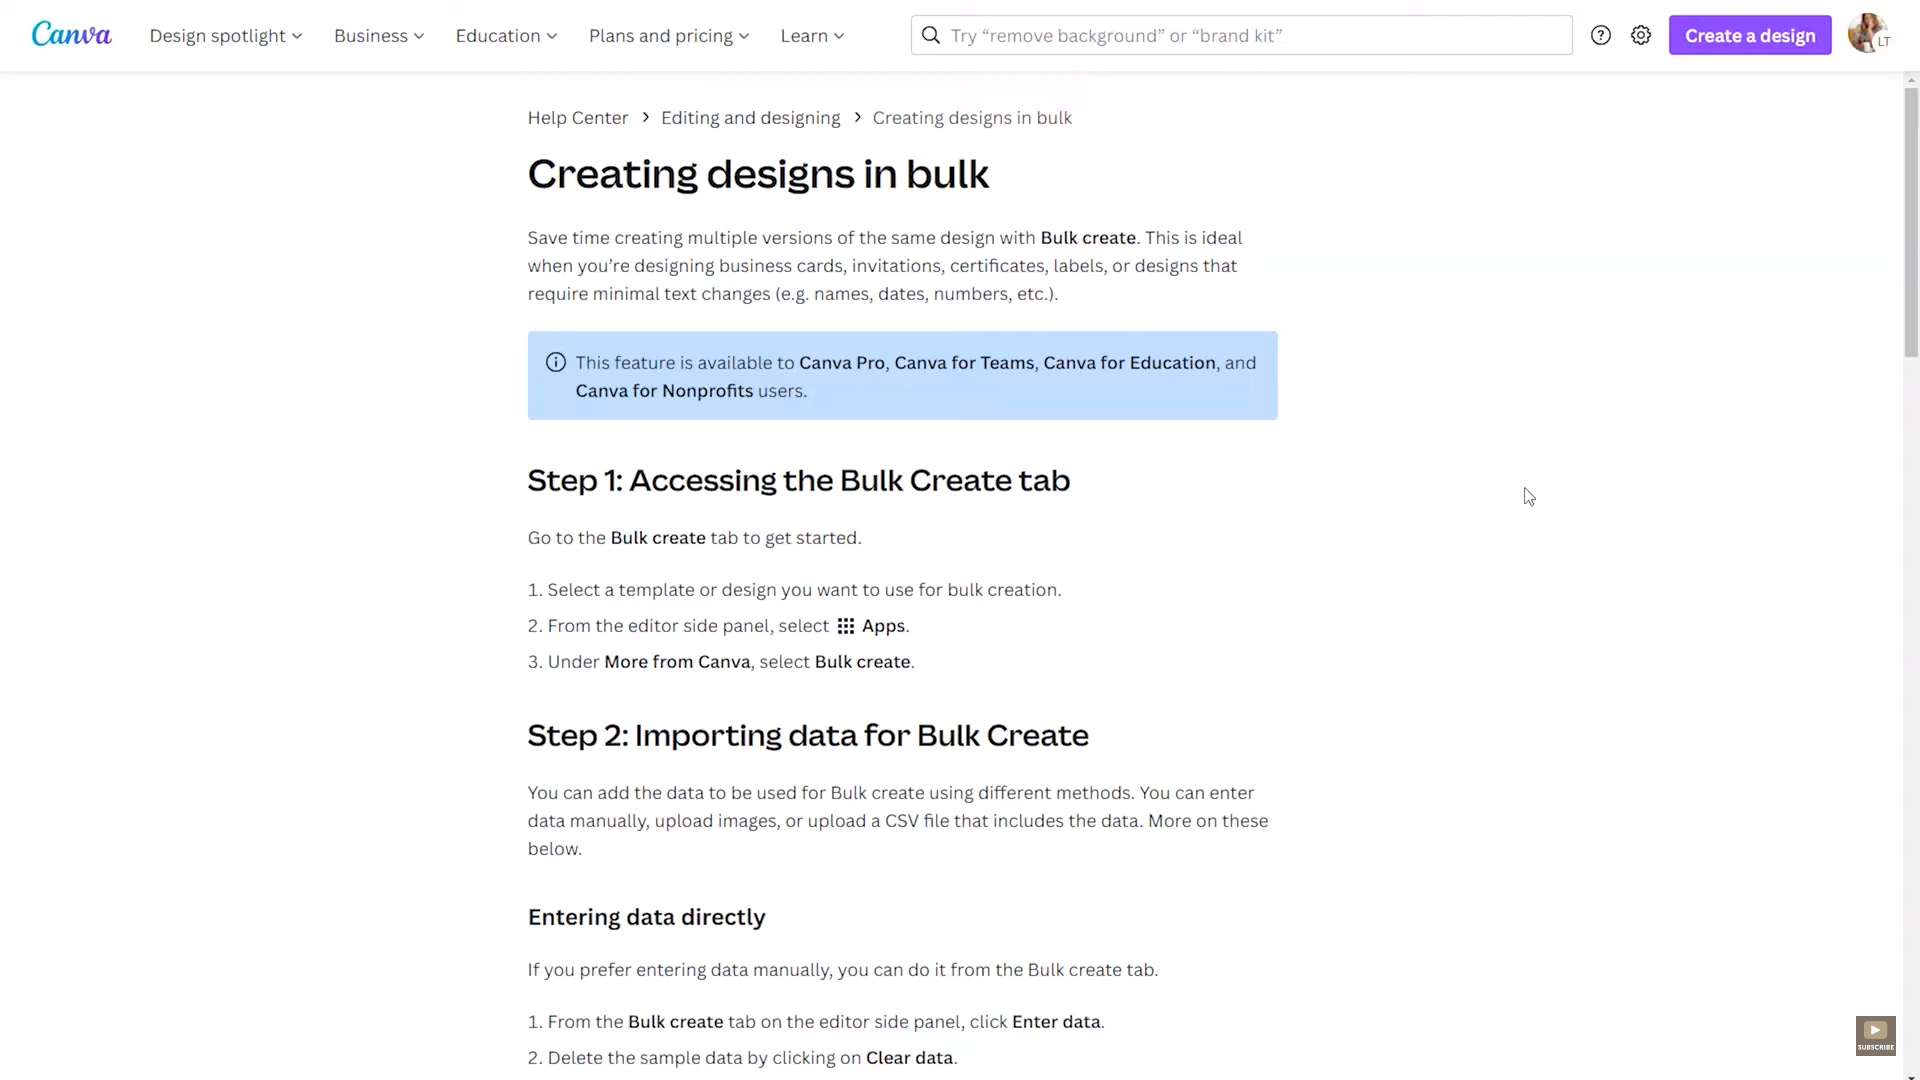
A couple of quick notes before we get started. Number one is I'm going to link to this article. It does a very good job of walking you step by step through the process for those of you who would like to have something open in another window while you're creating so you don't have to start and stop this video. And the other thing is, this feature is available to Canva Pro users, Canva for Teams, Canva for Education, and Canva for Nonprofit Users. If you do not have a Canva Pro account and you want to have access to this feature, you can utilize my link lashondabrown.com/canva to get access to a free 45-day trial of Canva Pro. What I'm going to do in this tutorial is take you back and forth between this help article and the actual Canva Design Editor so you can see how this works. When I did walk through it, I did notice that you want to find apps within the Canva Design Editor to find the Bulk Create button. So if you don't see it on the left-hand side that is how you would access it.

We are going to use this business card as an example for something we can bulk create. So like I said, we're going to scroll to the bottom and we're going to click on Apps. And from there under more from Canva, you're going to see the Bulk Create option. From there, we can add our data. It says upload data as a CSV file or enter a table of data manually to quickly create hundreds of pages. So as you can see at the bottom, this design is considered page one, the back of the card is considered page two. So for this example, we're just going to play around with the front of the business card. And again, we can upload a CSV file from our computer or we can enter the data manually. If you're entering data directly, then you can do it from the Bulk Create tab. Make sure that you delete the sample data and enter or paste the data into the tables. If you need to add more columns or rows just click on the table cell then click Accept to proceed.

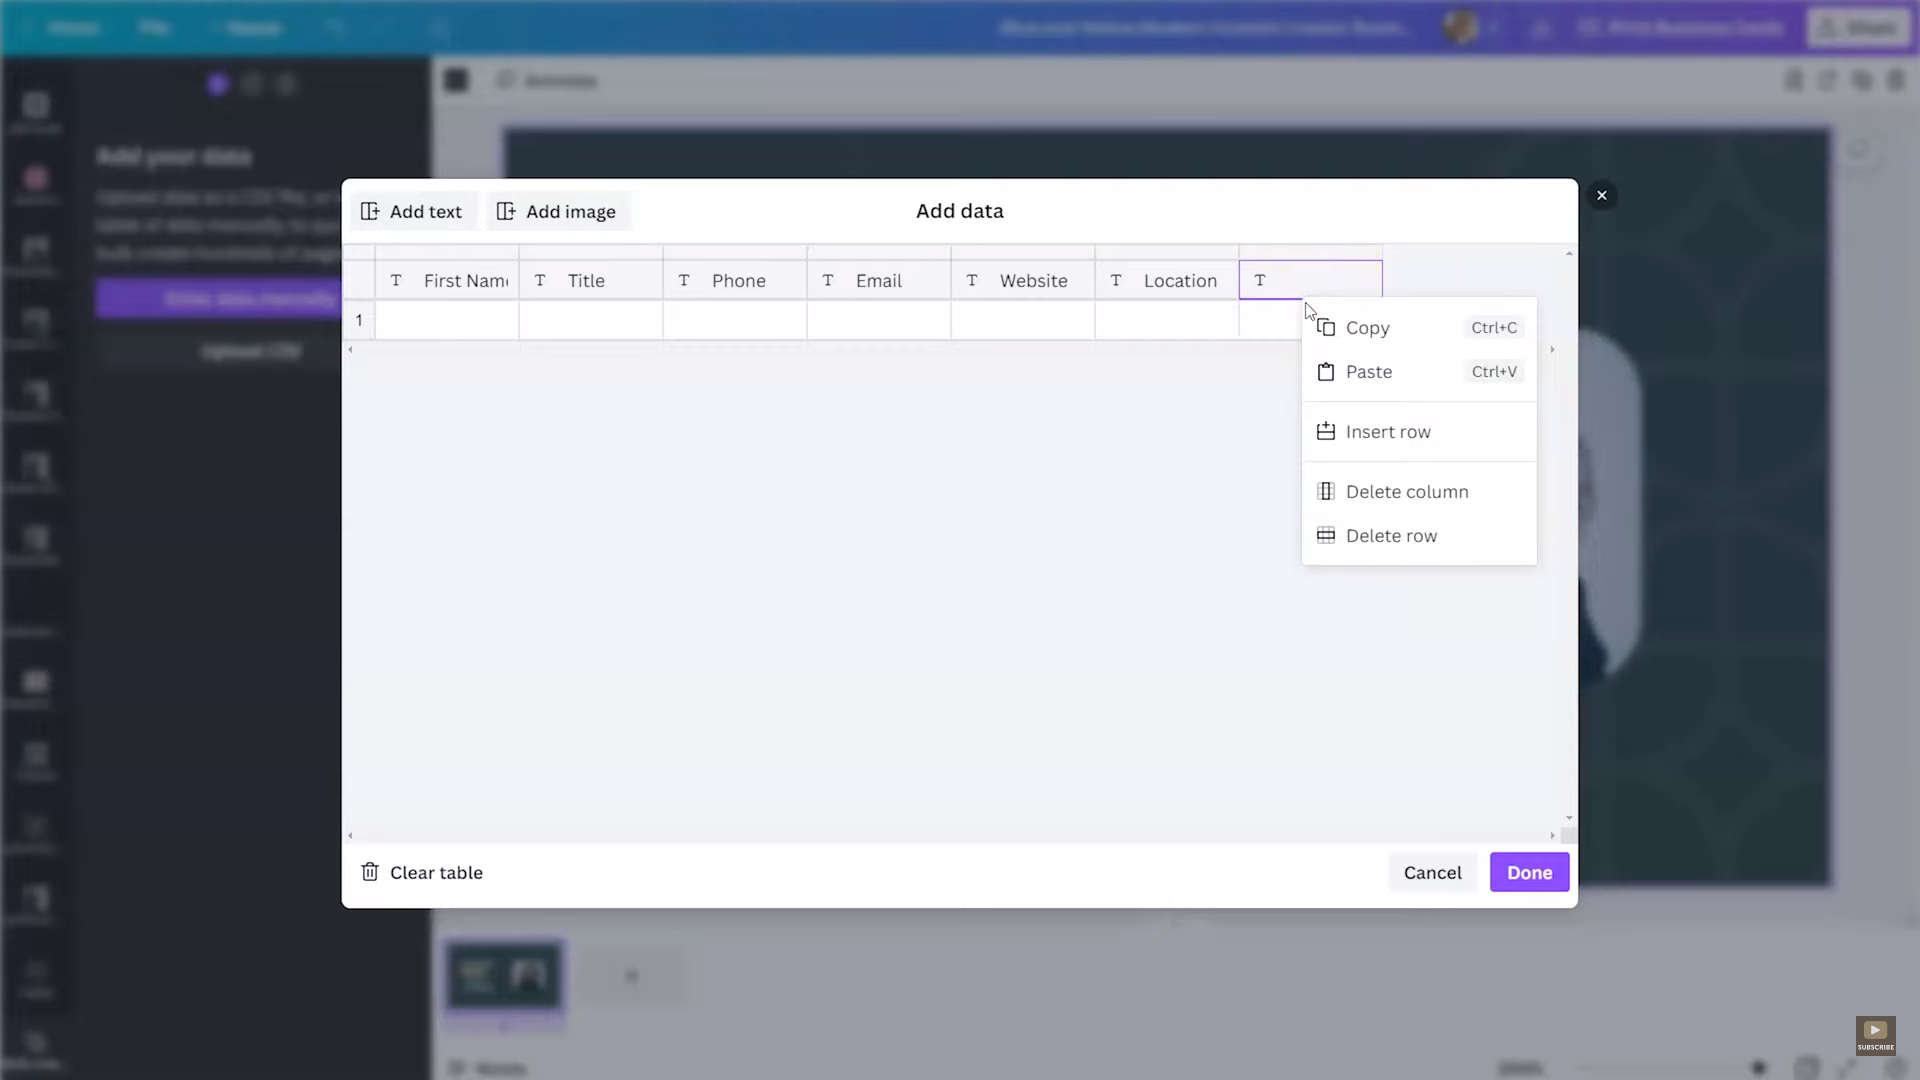
Alright, so when we go back we're gonna say enter data manually. And you are going to see here you have name, email, and we can add text or we can add an image. So when we go back to the design, we have a few areas here. We have name, we'll say title, phone number, email, website, and location. And so these are the things that we would like to feature in those columns within Canva. That way Canva knows exactly where to put that data in the design. So now that we have taken a closer look at the template, we need to set up the table and then start entering that data manually. So at the top, I would click and label all of these so you don't have to remember what goes in each column. And then you can start to fill out the information to be imported into Canva underneath it.
To get access to a 30-Day FREE trial of Canva Pro visit lashondabrown.com/canva
This is the longest free trial available for Canva and was provided to me as a Canva Verified Expert. Use this affiliate link to claim your 30-Day trial and support the channel at no additional cost to you.
If you find that you have created too many columns, you can simply right-click on the column and delete the column. So what I did here is I added in first name, title, phone, email, website location, and the last one is I want to add an image. From there I'm going to put in my first row of information now that I have established the columns for the data. When you get to the image column, you can select an uploaded image from your Canva library. So we're going to click there and this again is where these Canva folders come in. So if you did not watch the video about how I organize my Canva account with folders, you can find it here. Since I easily have a Canva t-shirt image folder. I can just scan here and select the image that I would like to appear on my business card. Now if there were other members of my team, I could import their information here manually and when I am done, I click on Done.
Now that you have created your columns and added in your data, we need to connect your data to the elements in your design template. So to do that, we're going to right-click on the element and then select the data field that we would like to be dropped into that element. So we're going to right-click here, connect that data to first name and we can expand it. Here we want to connect that to title, this will be connected to phone. And so this is simply telling Canva put this information in this space. After you do this once for your design, any data that you add will be dropped into the correct location. For image, you would do the same thing, connect that data to image.

Now that we have everything in we're going to click Continue. And it says apply the data create pages based on the data that you entered. You can either select all or specifically select the one that you are trying to create. So if you created the format for your design first and you came back later with the rest of your data, then you wouldn't have to export the same designs all over again. So if you were to create this format for members of your team, if you hired a new team member, you could just select that person's dataset instead of your entire collection. So we're going to click on Generate page.
Let Canva think about it and hopefully what will happen is it will drop everything in. And so as you can see, I think everything looks great. So just in case, if you want to change the image after the fact you can always go in and replace the image. Here I see that this was a bit long for that option so if I wanted to change that I can adjust that text and maybe move that line over just for my design or I can even make the font smaller.

So I think this is a really cool option for people that have teams or are doing things on a larger scale. If you are a solopreneur working from home, you may not utilize this feature that often. But if you are a part of a nonprofit or you're running a small business, I could totally see you creating designs based on data to save yourself time. Also, as you continue to grow and expand it'll make it a lot easier for you to make new designs based on datasets versus having to make a new design from scratch. I am going to link to the article that takes you step by step if you prefer to see things written out this way, but obviously, you can reference this post later if you want to do this more intermediate technique to create designs within Canva.
Thanks so much for reading this post. I'm LaShonda Brown, a Canva Verified Expert from Virginia. If you would like a Canva Pro free trial for 30 days, visit lashondabrown.com/canva. I'm always available to help train your team on how to get the most out of your Canva subscription. So if you'd like to book a training, feel free to message me at lashondabrown.com. Until next time to tata for now.
Pin This Post


you might also like: